
Have you looked at your bare concrete floor and wondered whether you could lay a finished surface over it yourself? Click-lock laminate flooring makes that possible for most homeowners with a weekend and a modest set of tools. The planks snap together without glue or nails, which removes much of the skill barrier that keeps people from attempting a floor project. What follows is a practical account of what the work actually involves.
Why Click-Lock Laminate Works Well Over Concrete
Concrete slabs are flat, stable, and common in basements, additions, and ground-floor rooms. Click-lock laminate is designed as a floating floor, meaning it rests on top of the slab rather than being fastened to it. That matters because concrete expands and contracts with temperature and moisture, and a floating floor accommodates that movement without buckling.
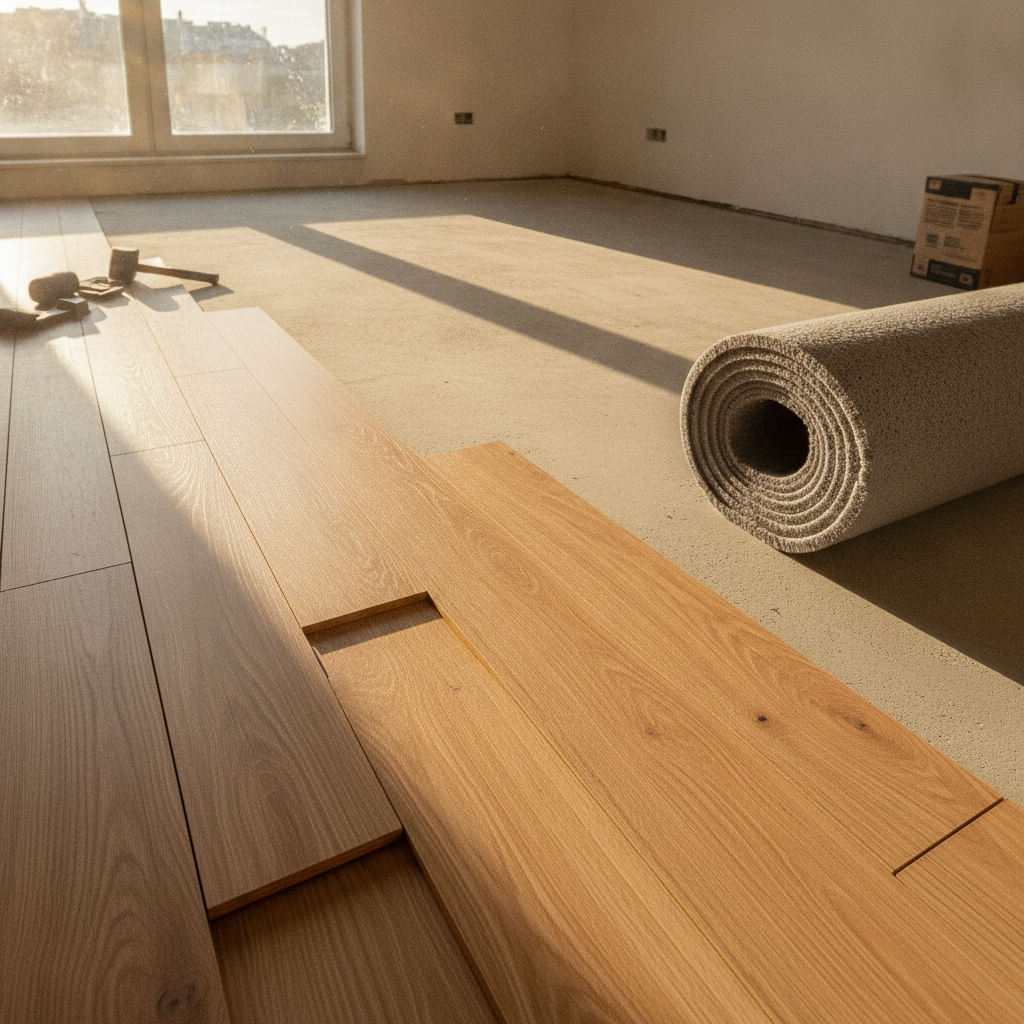
The economics also favor this approach. A floating laminate floor sidesteps the cost of adhesives, fasteners, and the specialized labor that glue-down or nail-down systems demand. For many rooms, the material and underlayment are the main expenses, and the installation time stays within a single weekend.
Assessing Your Concrete Subfloor Before You Start
The condition of your concrete subfloor determines whether the finished result looks professional or reveals every flaw underneath. Before buying a single plank, you need to know how level the slab is, whether it holds moisture, and whether cracks or pits need attention. Skipping this step is the most common reason floating floors fail prematurely.
Check for flatness with a long straightedge, looking for gaps or high spots across the surface. Most laminate manufacturers specify a tolerance of about 3/16 inch over a 10-foot span. High spots can be ground down, and low spots can be filled with a self-leveling compound, which typically runs a modest amount per bag and spreads easily.
Signs Your Slab Needs Extra Prep
- Visible moisture, efflorescence, or a damp smell near the surface
- Cracks wider than a credit card or sections that have shifted
- Dips or rises you can feel underfoot when walking across the room
- Dust or flaking that comes up when you rub the surface
Testing for Moisture, the Step Most People Skip
Moisture is the quiet enemy of any floor laid over concrete. A slab can look bone dry and still release vapor that warps laminate from below. Testing takes little time and spares you from tearing out a floor months later. The decision to test is a small cost against a large potential loss.
A simple approach is taping a square of plastic sheeting to the slab and leaving it for a couple of days. Condensation underneath signals a moisture problem that calls for a vapor barrier or a different flooring strategy. Calcium chloride test kits give a more precise reading if you want numbers rather than a visual check.
Choosing Underlayment and the Right Laminate
Underlayment sits between the slab and the planks, cushioning footsteps, dampening sound, and often blocking moisture. Over concrete, you generally want an underlayment with a built-in vapor barrier or a separate 6-mil polyethylene sheet beneath a standard pad. The right choice depends on how much moisture your slab test revealed and how quiet you want the room.
Laminate itself varies in thickness and wear rating. Thicker planks, around 10 to 12 millimeters, feel more solid underfoot and tolerate minor subfloor imperfections better than thin budget options. The wear layer, measured by an abrasion-class rating, tells you how a floor holds up in a busy hallway versus a quiet bedroom.
What to Weigh When Comparing Products
- Plank thickness and whether it suits the traffic in the room
- Abrasion-class rating for scratch and wear resistance
- Whether the underlayment includes a vapor barrier or you add one separately
- Water-resistant or waterproof cores for below-grade spaces
- Total cost per square foot including underlayment and trim
Tools and Materials Worth Having on Hand
A click-lock installation does not demand a large tool collection, which is part of its appeal for a DIY flooring project. Most of what you need is inexpensive or already in a basic home toolkit. Renting a single specialized tool is cheaper than buying it outright if you only expect to lay one floor.
Having everything ready before you open the first box keeps the work moving and prevents the mistakes that come from improvising mid-row. A clean, cleared room with the planks acclimated for a day or two will make the actual snapping-together feel almost effortless.
The Core Kit for a Smooth Install
- Tape measure, pencil, and a carpenter's square
- Utility knife and a fine-tooth saw or laminate cutter
- Tapping block, pull bar, and spacers for expansion gaps
- Rubber mallet and knee pads for comfort
- Chalk line to keep your first row true
Laying the Planks Row by Row
With preparation done, the click-lock installation itself is the satisfying part. You roll out underlayment, set your first row against a wall with spacers maintaining an expansion gap, and work across the room. Each plank angles into the one before it and clicks flat, locking the seam without glue. Progress is quick once you find the rhythm.
Stagger the end joints from one row to the next so seams never line up, which both strengthens the floor and looks more natural. Save the offcut from the end of one row to start the next when its length allows, reducing waste and keeping your pattern random. The final row often needs to be ripped to width with a pull bar drawing it snug.
Habits That Keep Rows Aligned
- Maintain a consistent expansion gap of roughly 1/4 to 3/8 inch around the perimeter
- Stagger seams by at least eight inches between adjacent rows
- Check every few rows that the floor is still square to the starting wall
- Tap seams closed gently to avoid chipping the plank edges
Finishing Edges, Transitions, and Trim
The difference between a passable floor and a polished one lives in the edges. Once the field is laid, you remove the spacers and cover the expansion gap with baseboard or quarter-round molding. Doorways and places where the laminate meets another floor type call for transition strips that hide the seam and allow movement.
Transitions and trim are modest purchases, but choosing colors that complement the planks pulls the room together. Undercutting door casings so planks slide beneath them, rather than cutting the planks around the casing, is a small extra effort that reads as professional work. These finishing touches protect the edges and extend the floor's long-term value.
Living With Your New Floor Over Time
A click-lock laminate floor over concrete asks little once it is down, which is a large part of its appeal. Routine sweeping and the occasional damp mop keep it looking new, and the floating design means a damaged plank can sometimes be swapped out without redoing the whole room. Felt pads under furniture guard the wear layer against scratches.
Keeping the room's humidity reasonably stable helps the floor last, since laminate still responds to large swings in moisture even with a vapor barrier below. Over the years, the main costs are the pads, cleaning supplies, and perhaps a few spare planks held back from the original batch. A floor installed with care tends to serve a room for a long stretch of ordinary use.
Installing click-lock laminate over a concrete subfloor rewards careful preparation more than raw skill, and the work sits comfortably within reach of a motivated homeowner. The slab assessment, moisture test, and underlayment choices shape the outcome as much as the planks themselves. With the right tools and an unhurried weekend, a finished floor is a reasonable project to take on yourself.